How Do I Get Started with My Campaign Fundraiser?
(1) Take a look at the article Campaigns: Creating, Running and Understanding Reports to see how you can set up a Campaign on PTBoard.
(2) Set up an appointment with Andrea HERE if you have any questions or need additional help.
Campaigns: Creating, Running and Understanding Reports
Setting Up Your Payment Receiving Account
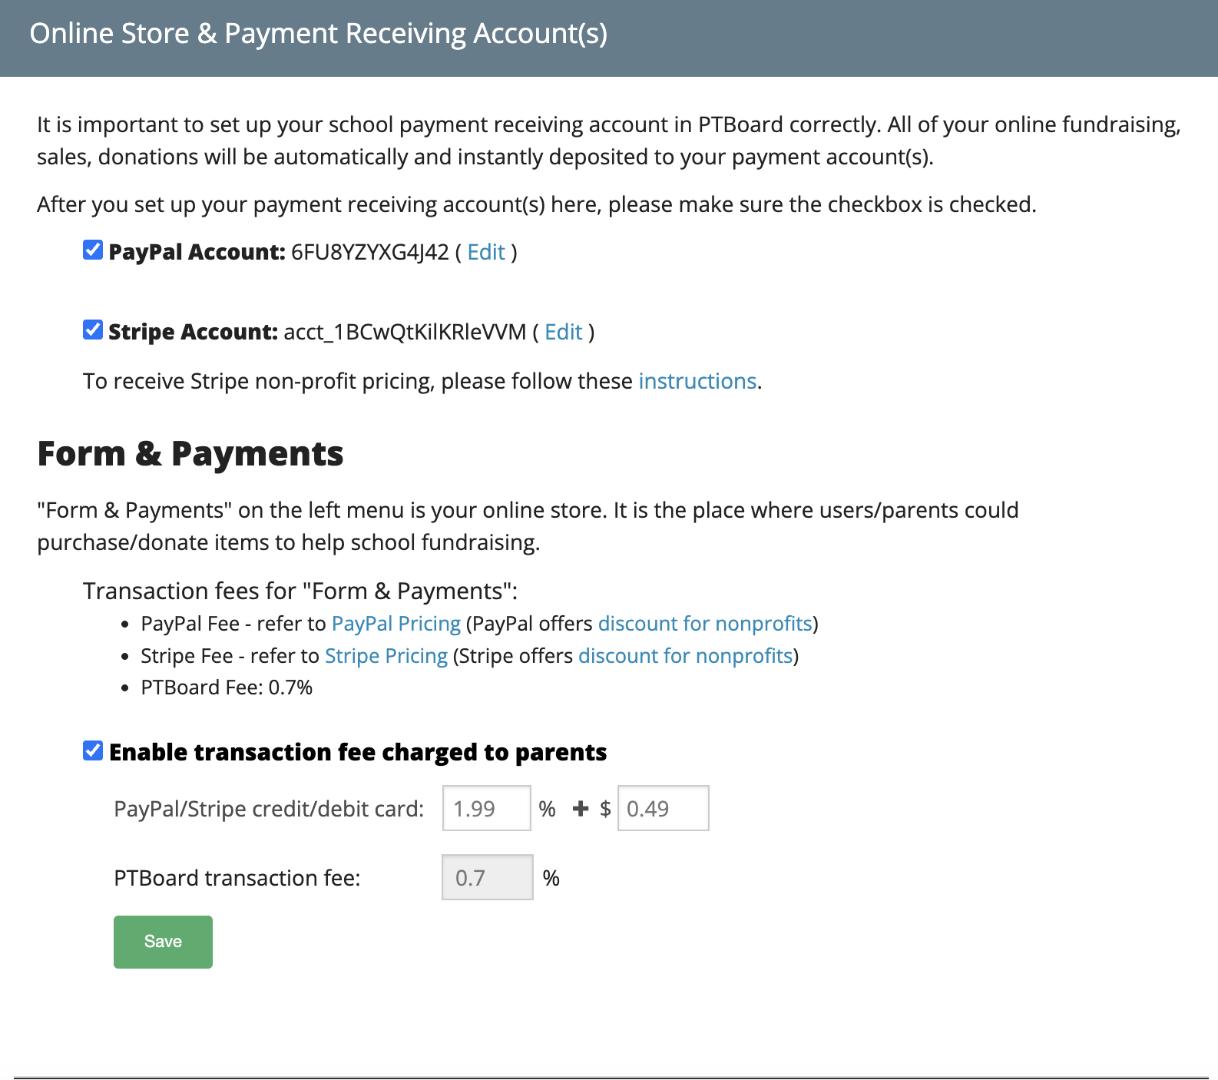
(1) Set up your Payment Receiving Account by going to "Manage School" if you haven't already done so. Then, scroll down to the second box, "Online Store & Payment Receiving Accounts." You can set up your PayPal and/or your Stripe account in this box below.
NOTE: Please see How Forms & Payments Work with Explanation of Fees for more information on how to set up a payment account.
(2) Once you have set up your payment account, scroll down to "Campaigns," and you will see this box:
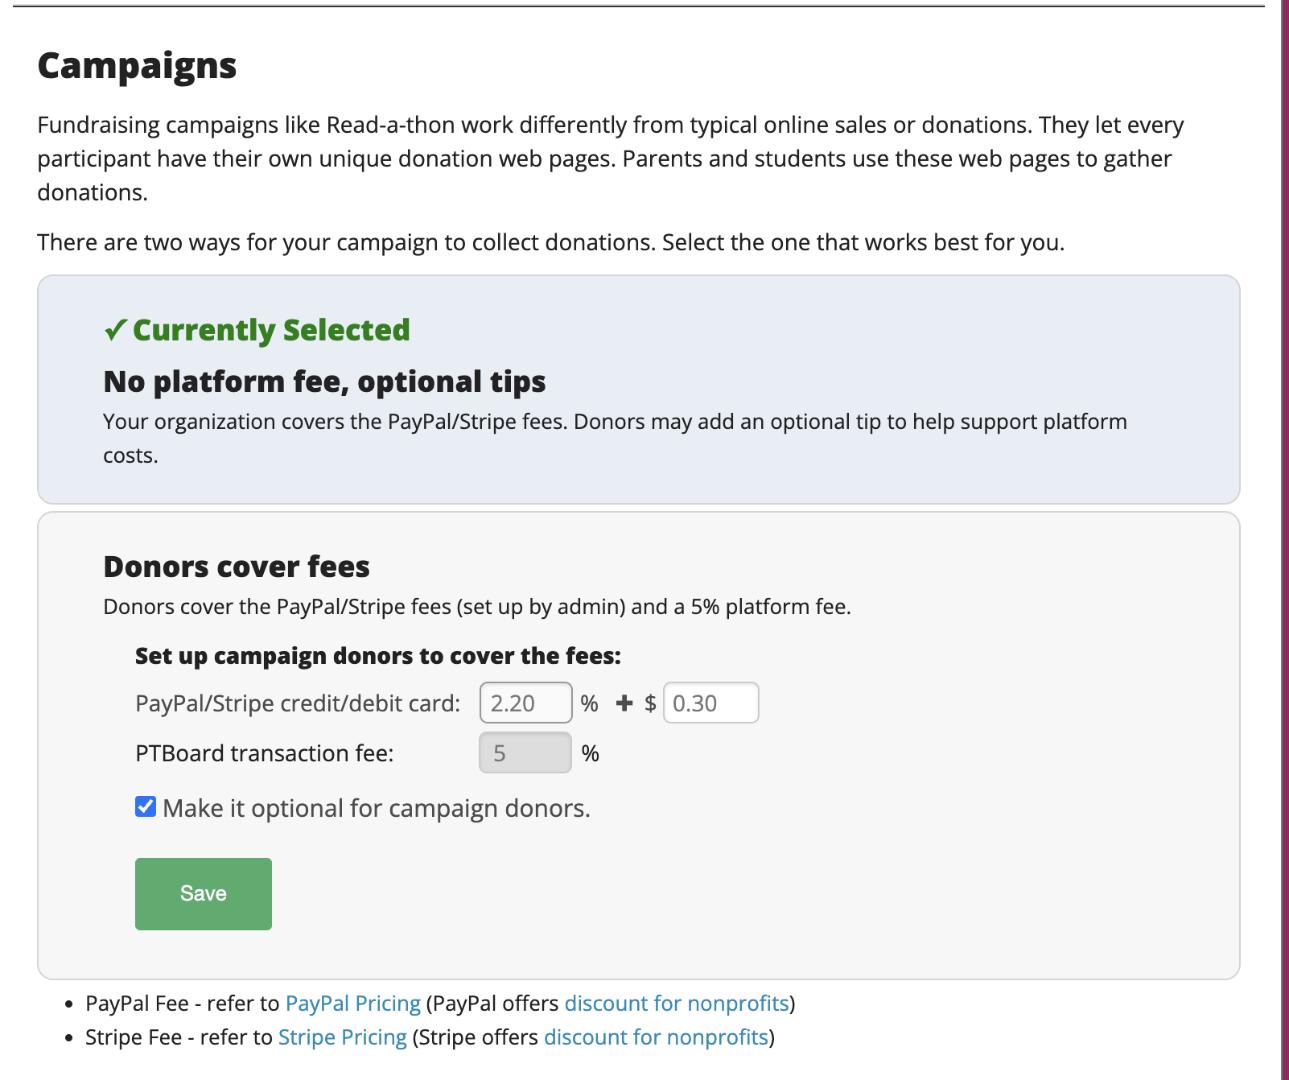
Transaction Fees
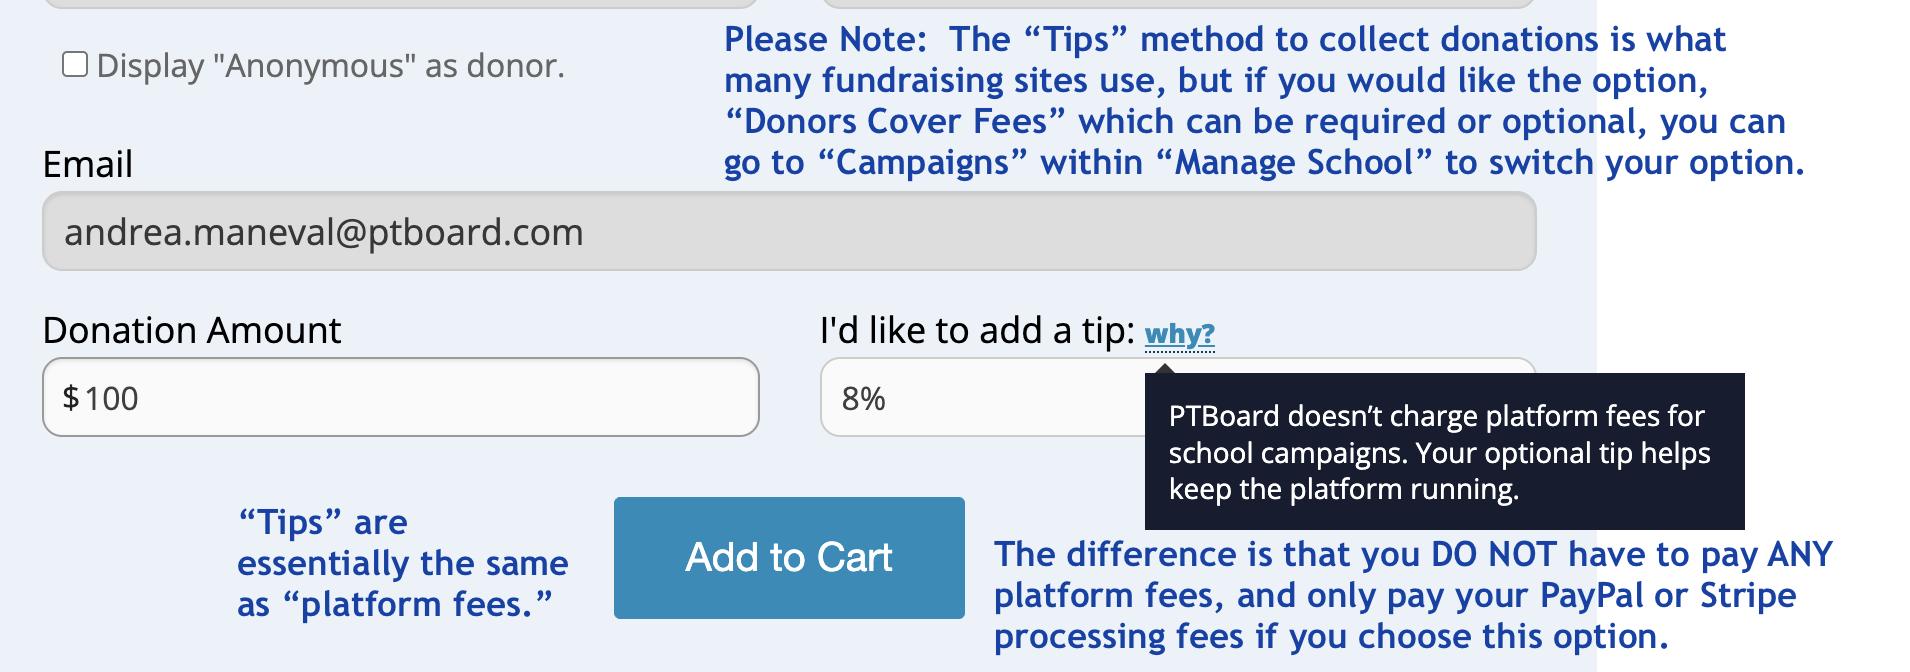
BRAND NEW FEE STRUCTURE! CHOICE TO HAVE NO PLATFORM FEES FOR CAMPAIGNS!
What does this mean?
Your organization will have NO platform fees; tips are optional for donors to help support platform costs.
Create Your Campaign
(1) Go to the left side menu, and click on "Campaigns," then "Manage Campaigns” to start setting up your Fundraiser by entering in your “Campaign” information.
Step #1 - Add your Campaign Title.
Step #2 - Add your Campaign Description.
Step #3 - Add your Fundraising Goal.
Step #4 - You have the option to add your Campaign "Activity Type." For example, if your Campaign is a Read-A-Thon, you would add "Read" in this box.
Step #5 - You also have the option to add your Campaign "Activity Unit." For example, with a Read-A-Thon, you can add "pages" or "books" in this box.
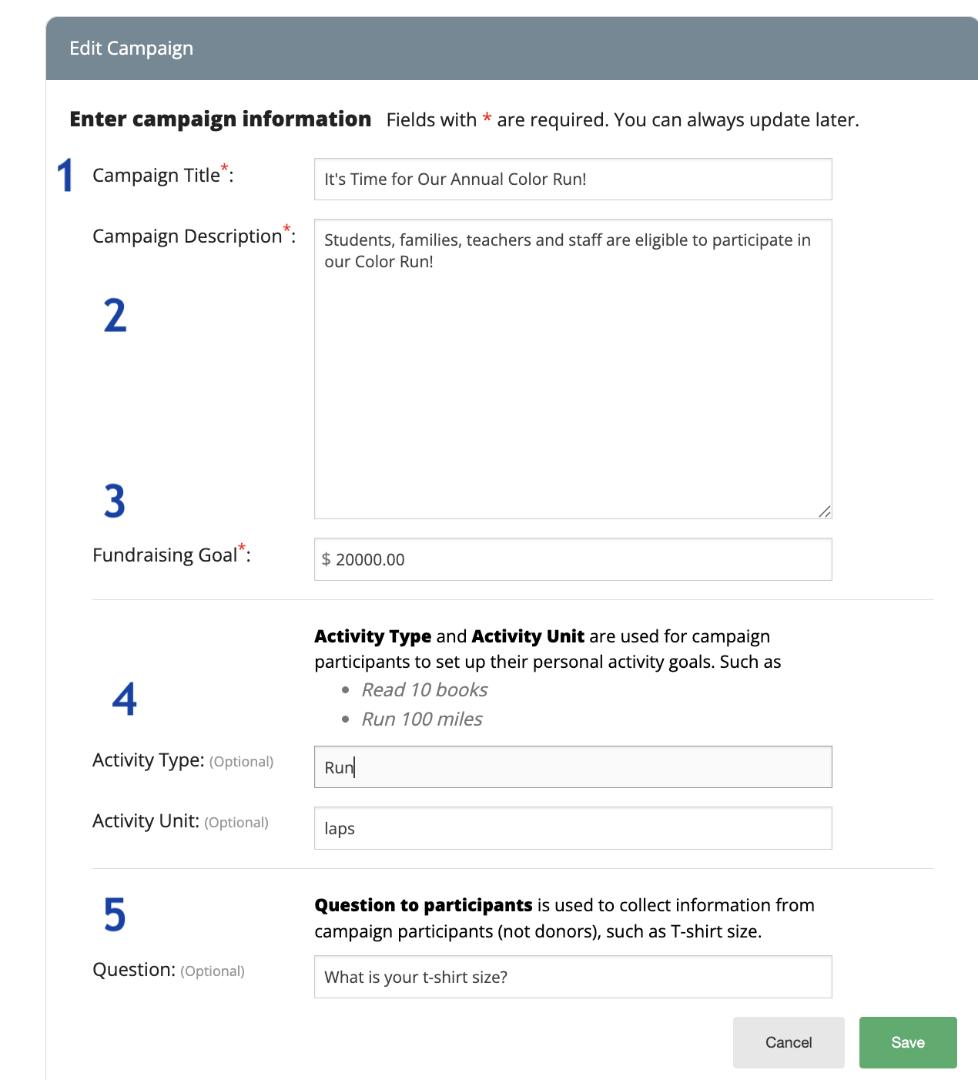
Once you “Save” your information, this is what you will see:
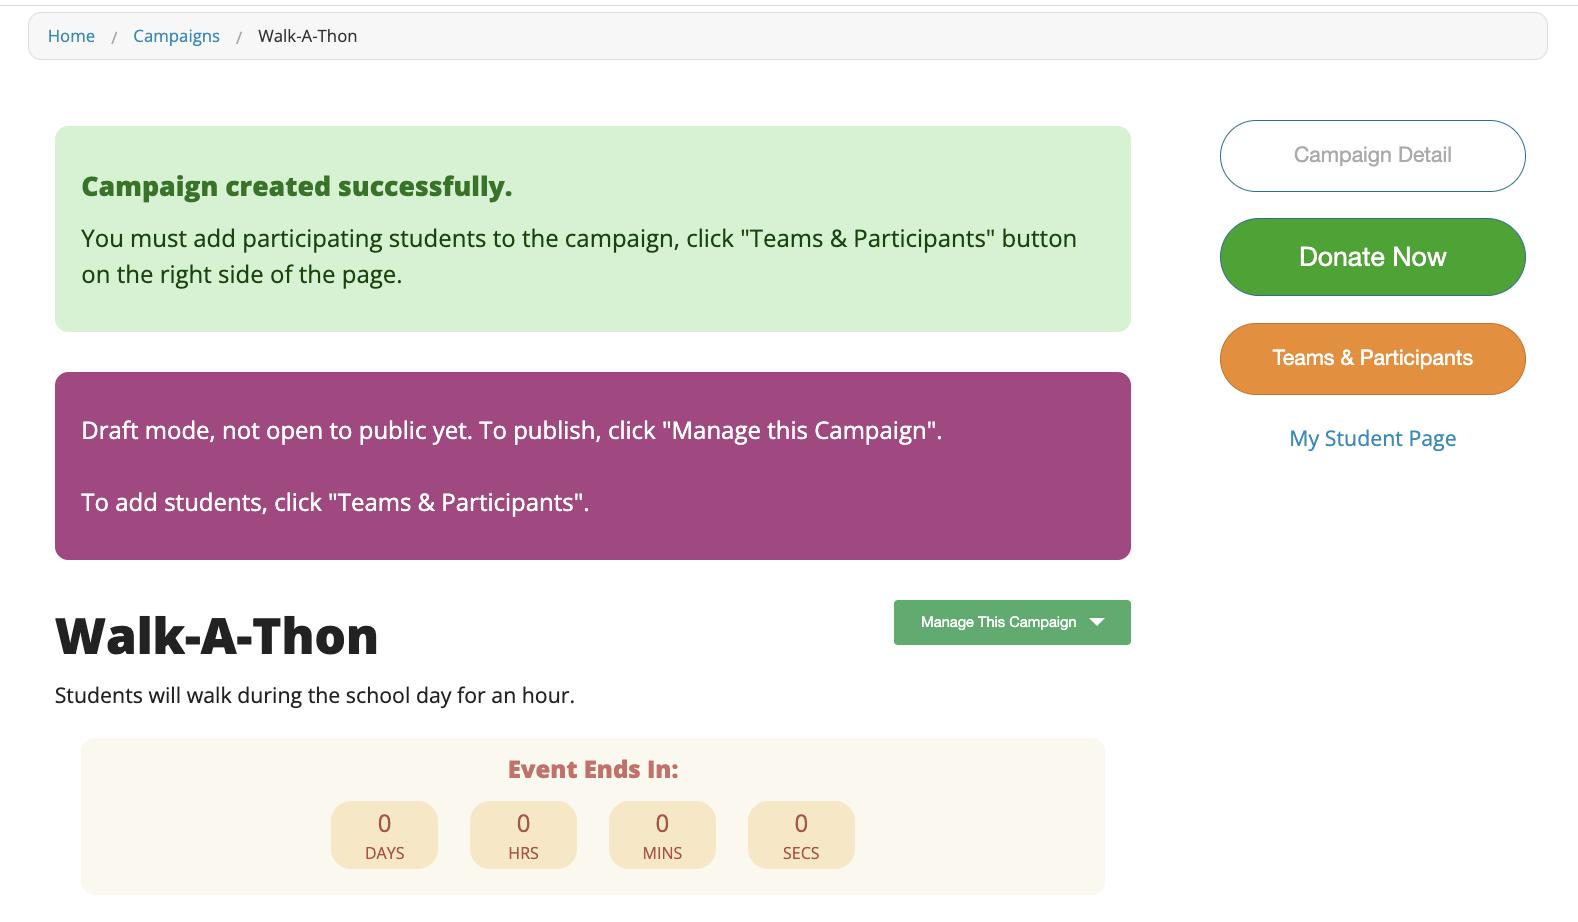
(2) Teams & Participants
Click on "Teams & Participants" to set up your "teams." Teams can be classes or grades etc.

Once you click "Teams & Participants," you will be able to click "Add New Team and Participants."
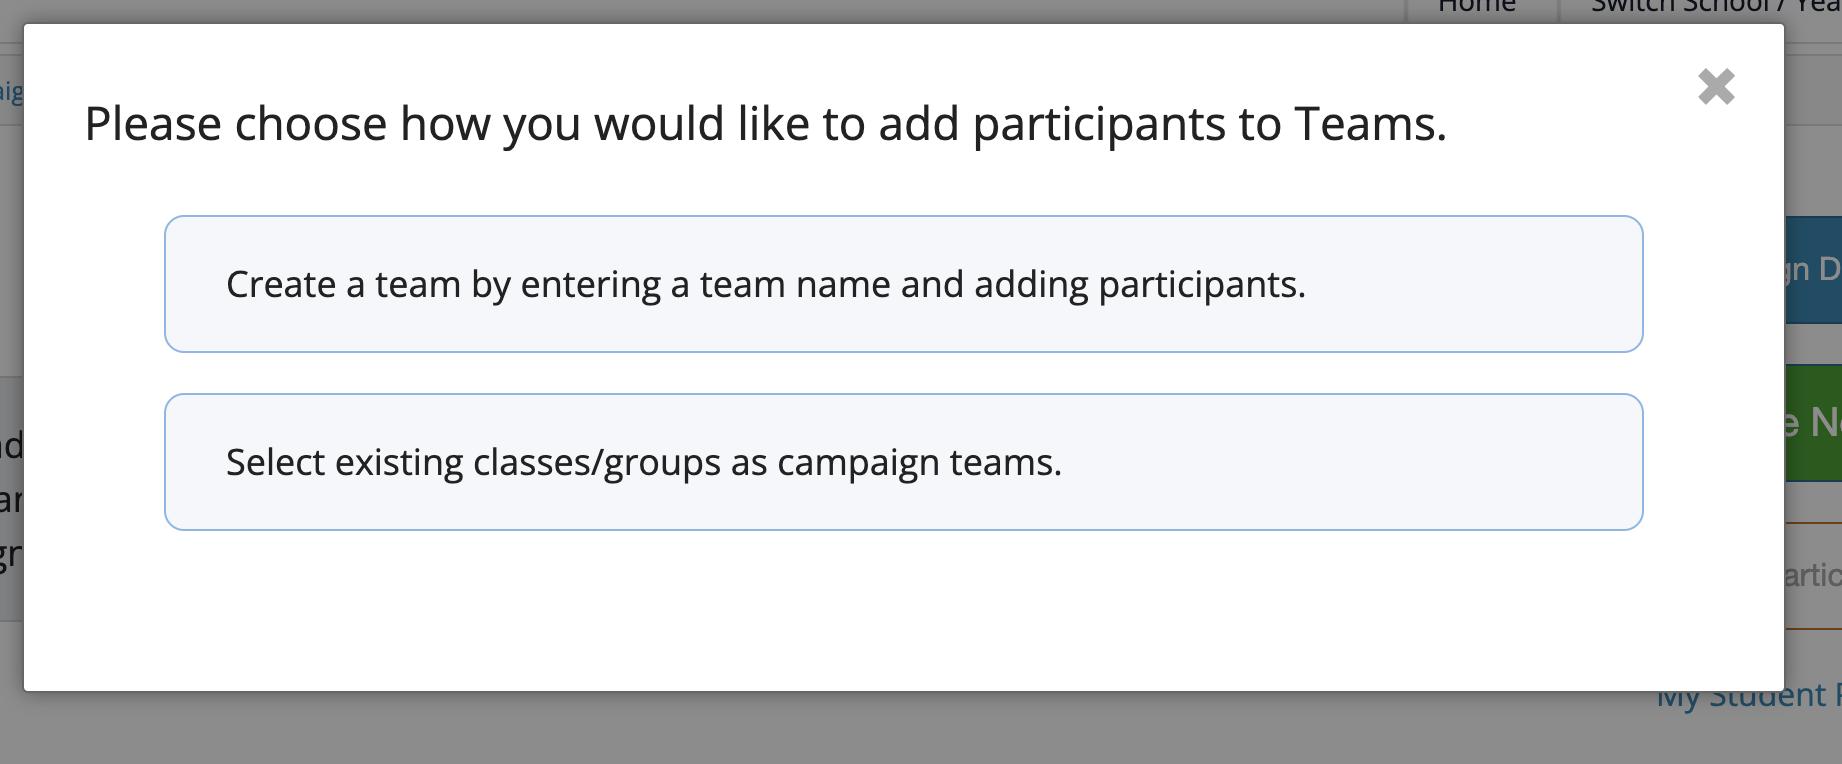
If you already have a list of parent names, parent emails and student(s) who are associated with each parent, you will be able to choose the "teams" you want to include in the Campaign.
In other words, if you have your parent names and emails in your "School Parent List" within "Manage User," you will be able to choose the classes, teachers, grades etc. you would like to include in your Campaign.
However, if you are uploading a list, you can do that through "Upload Users from Excel" within "Manage User."
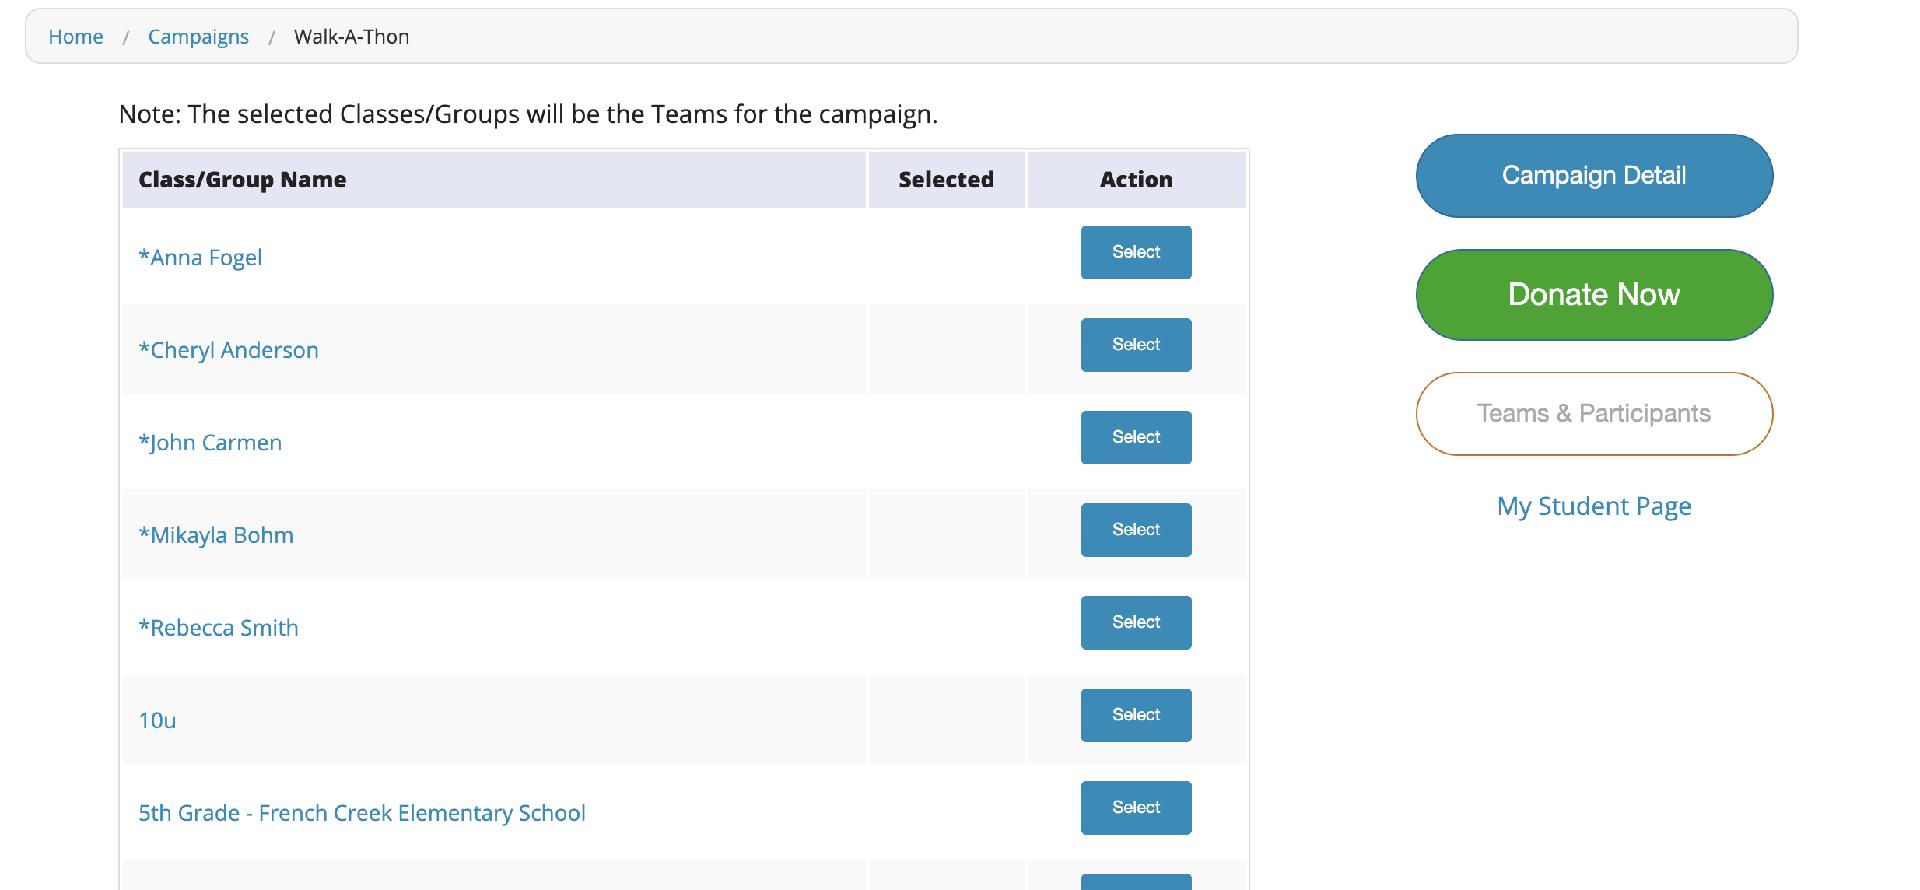
Teams can be set up however you would like and is best for your organization.
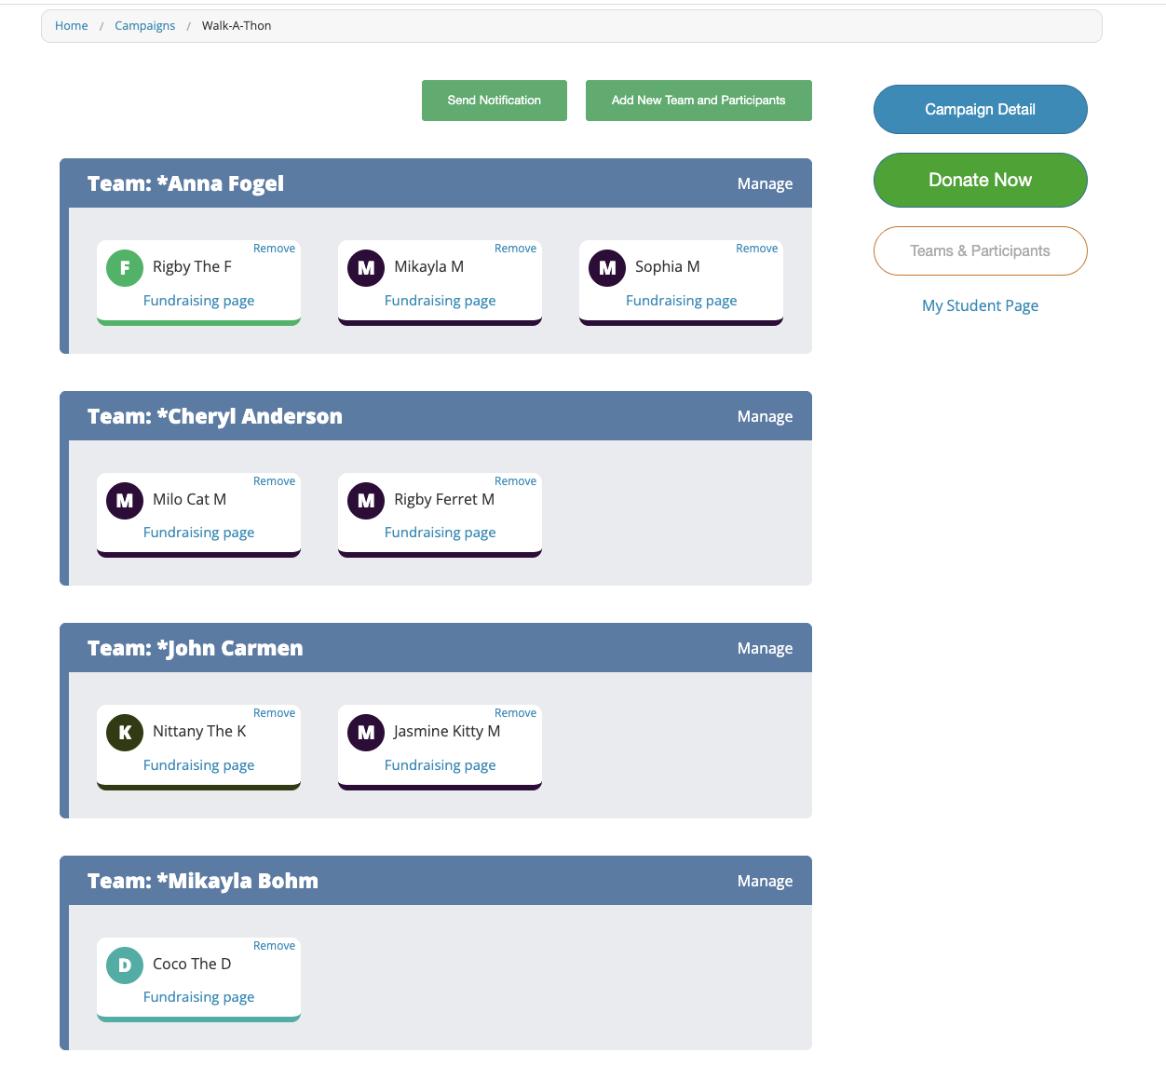
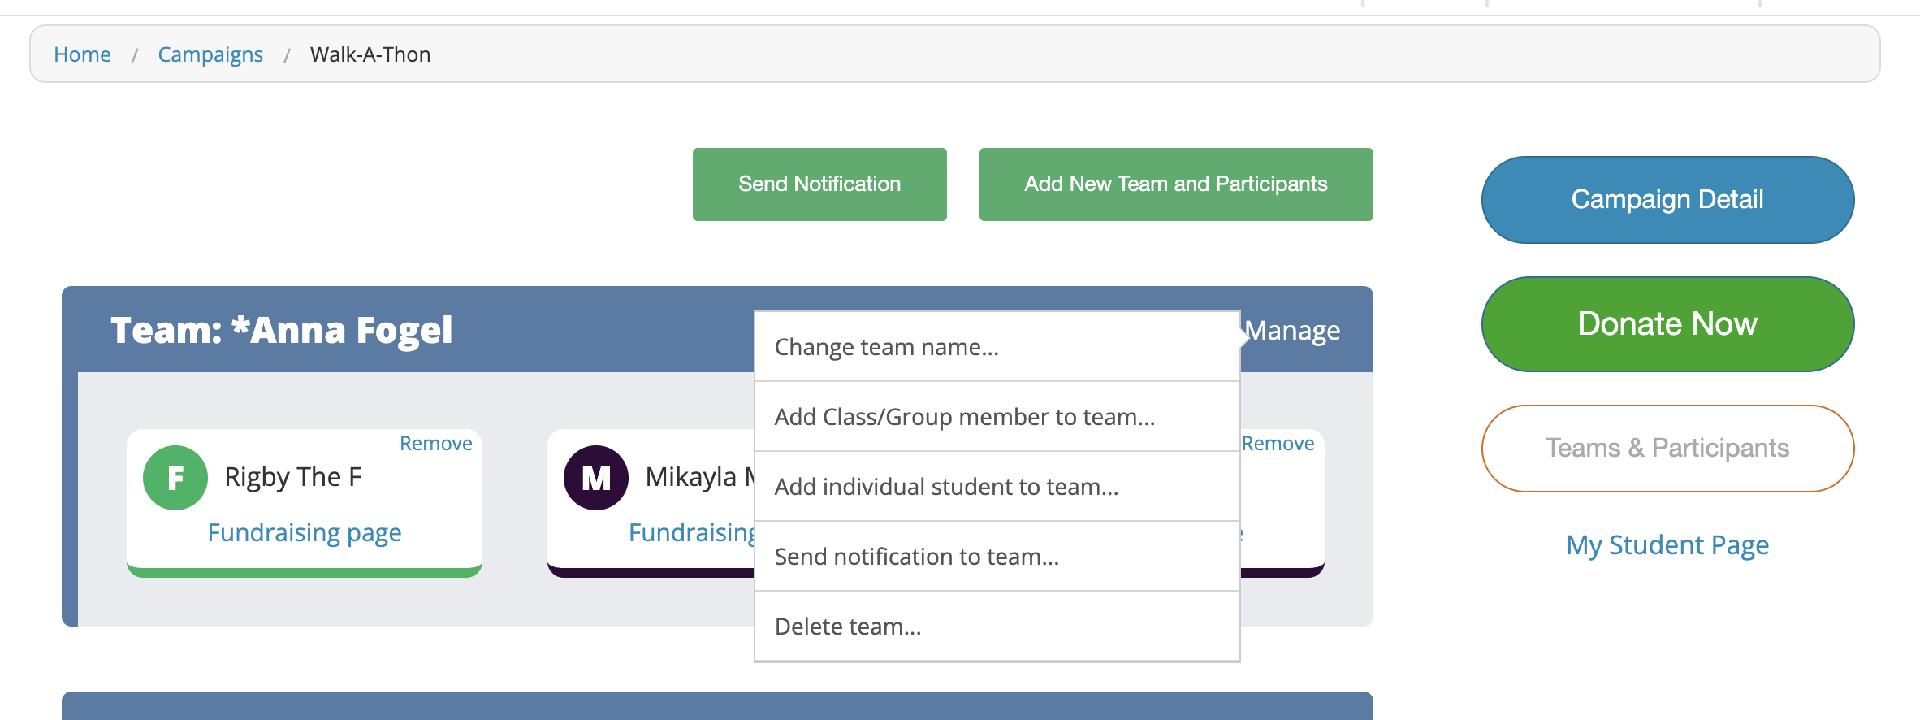
Once you have added your Students to Teams, you can always come back to “Manage” each team, add more Students or send a notification to a team.
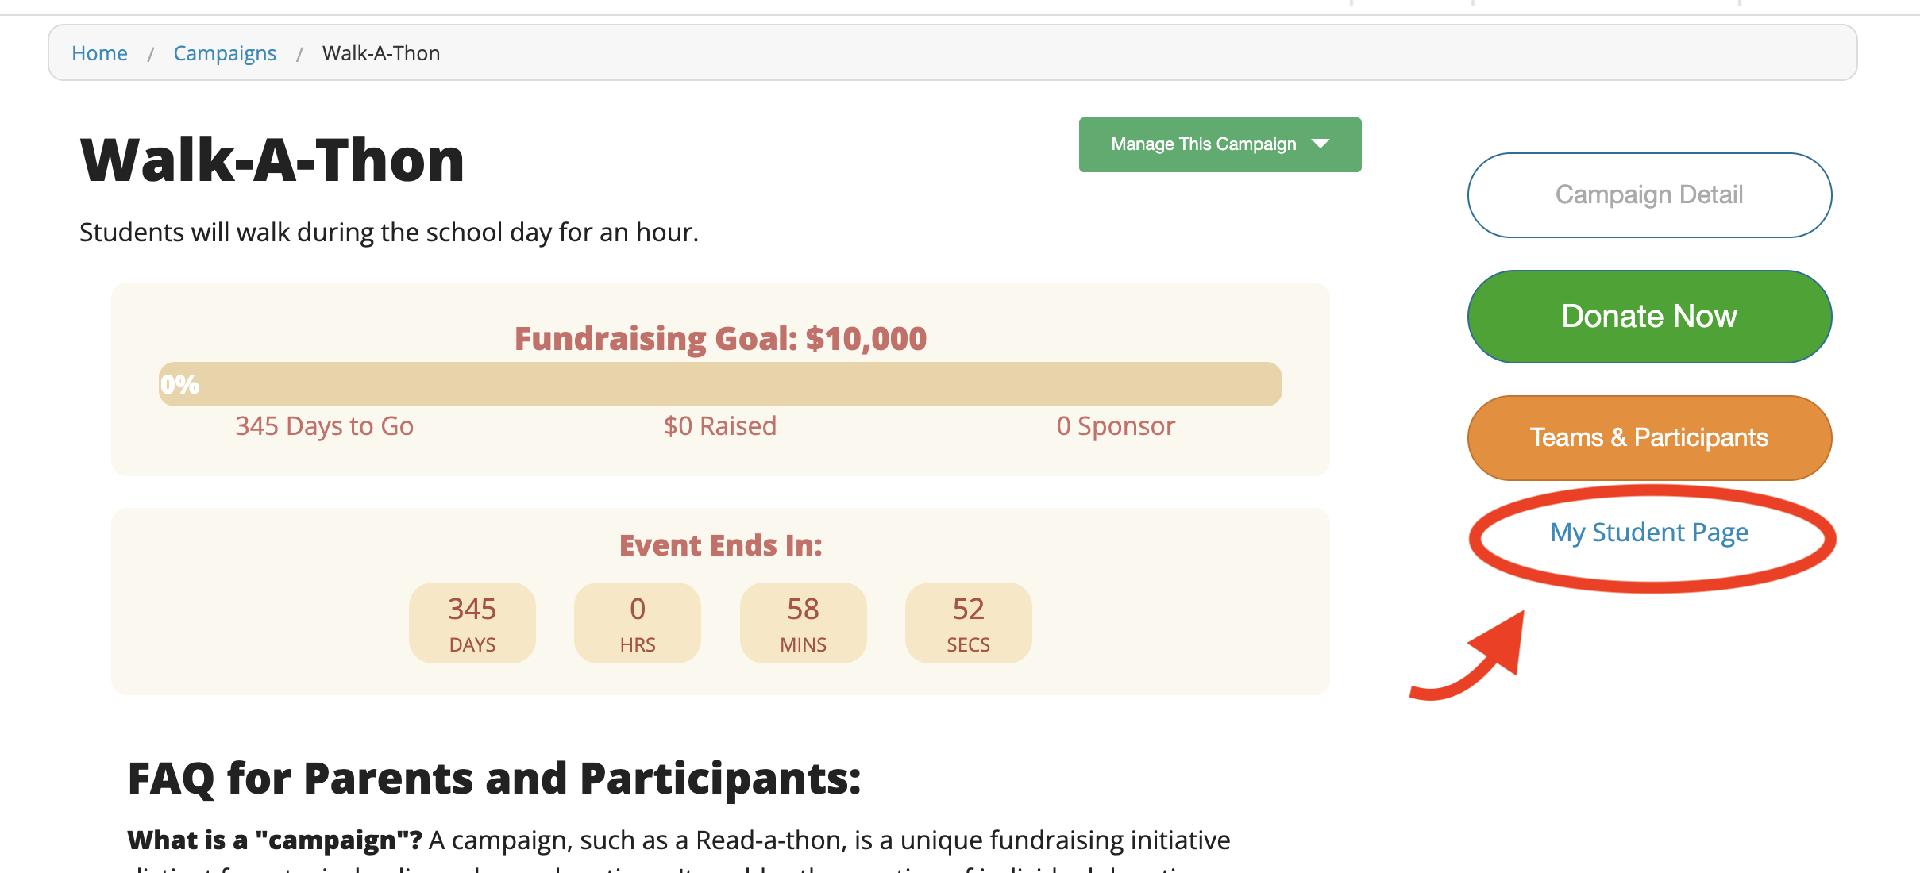
(3) Individual Student Pages
Parents can either set up an account or login if they do not have one, or they can login in with their account to customize their child(ren)'s page(s). On the main Campaign page, they just need to click "My Student Page."
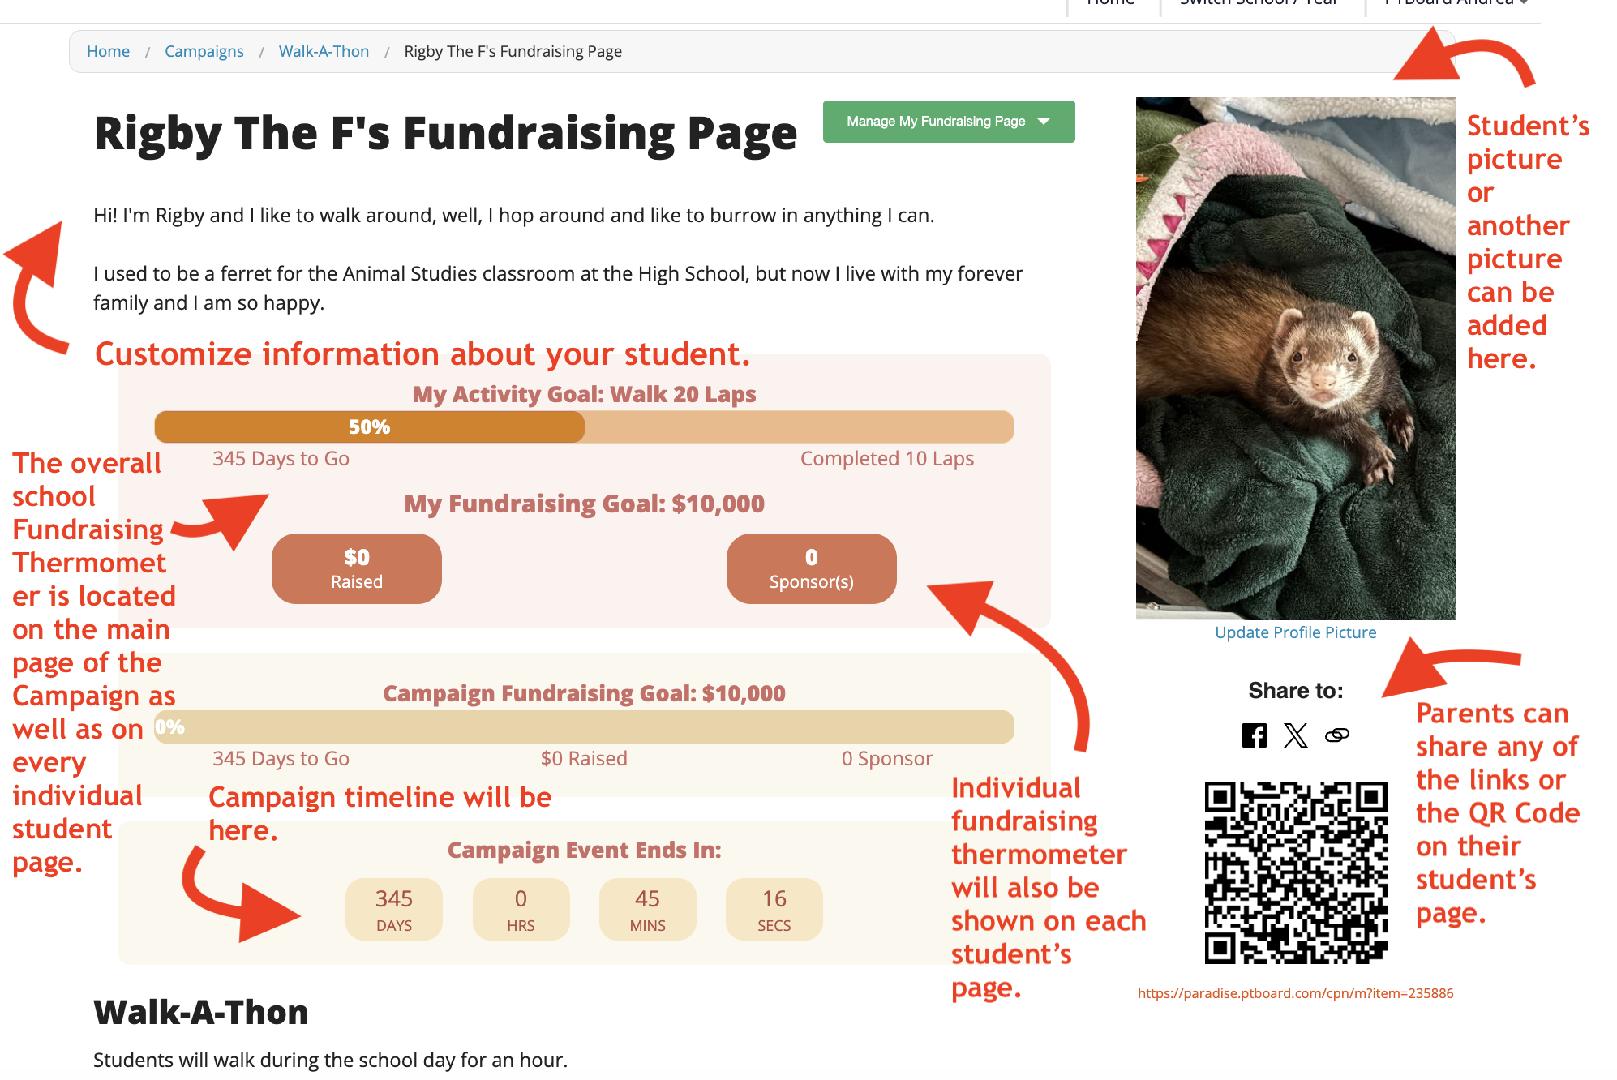
Setting Up Your Student's Page
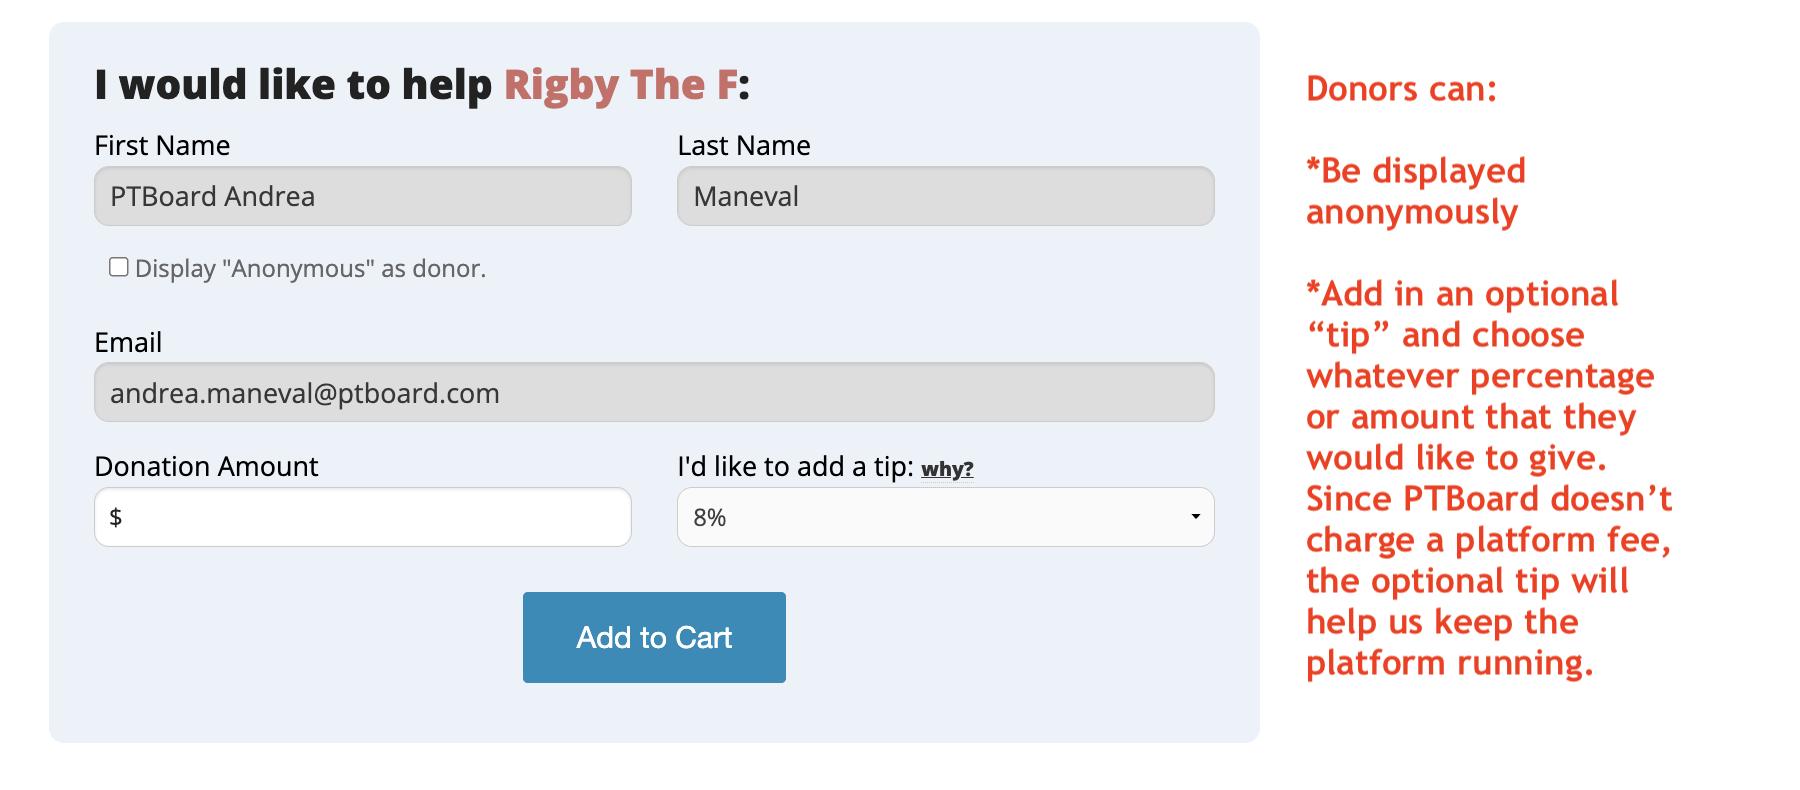
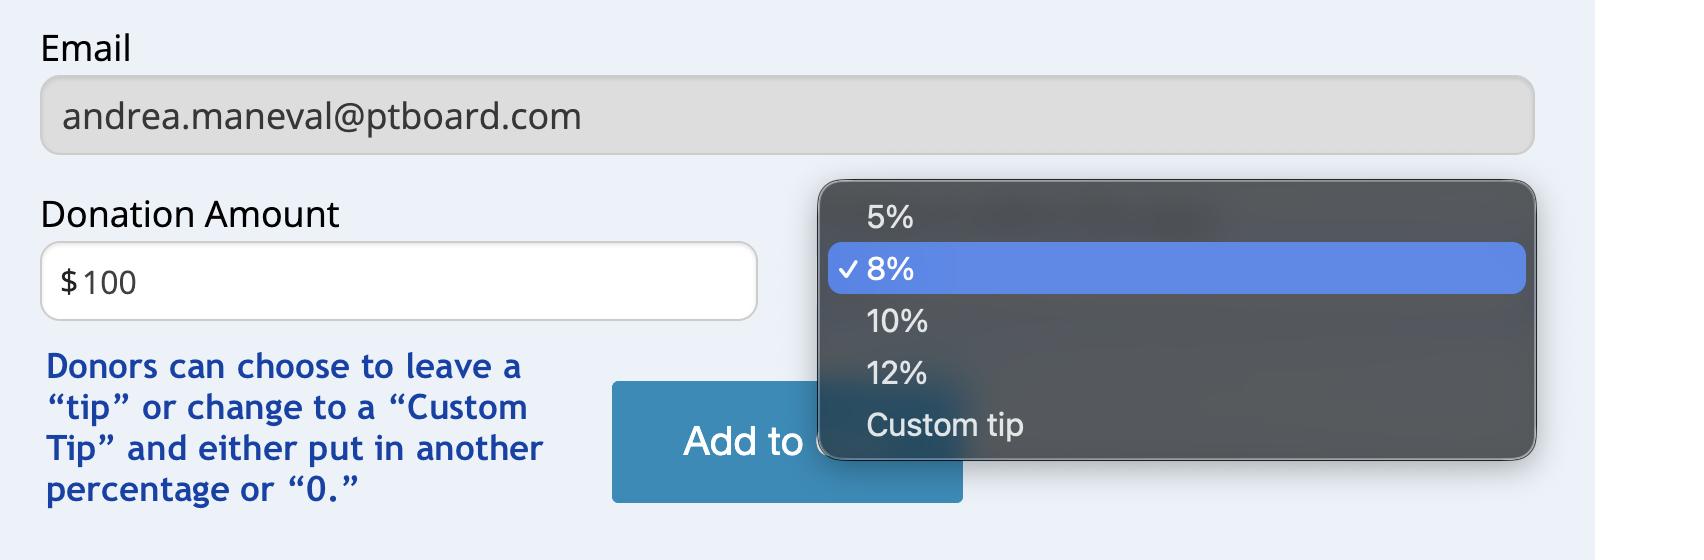
Here are additional screenshots showing options for "tips" as well as why a tip is an option for donors.
How to add a tip or use a "Custom Tip."
Individual Student Page Summary
-
If Students add their Activity Goal, it will be displayed in a "thermometer" format.
-
If Students add their Fundraising Goal, it will be displayed with personal total raised as well as the number of donors, including donors who have chosen to donate anonymously.
-
Students can log their progress throughout the fundraiser. Progress updates in real time once the Student saves the information.
-
The total Campaign Fundraising Goal is displayed on each individual Student page in a "thermometer" format.
-
Parents can upload their Student's picture.
-
Donors and donation amounts will be displayed on the right side of the page.
-
Donors can choose "Anonymous" to display on the Student page.
-
Each student has their own unique QR Code, URL and social media links to share with family and friends.
-
“Campaign Event Ends” is also listed with the days, hours, minutes and seconds in real time.
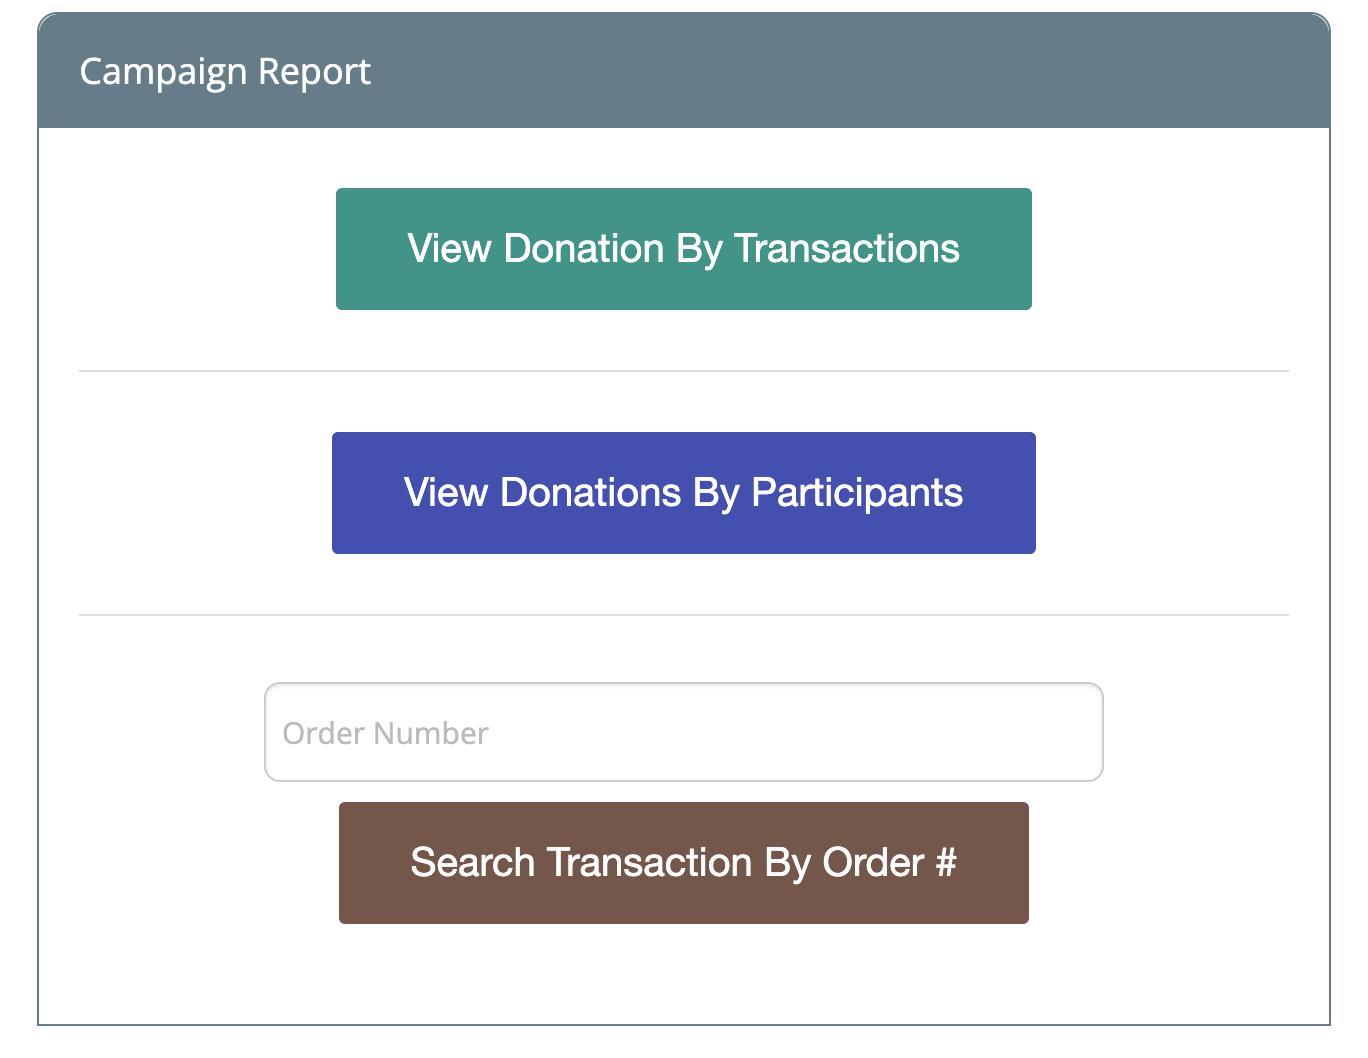
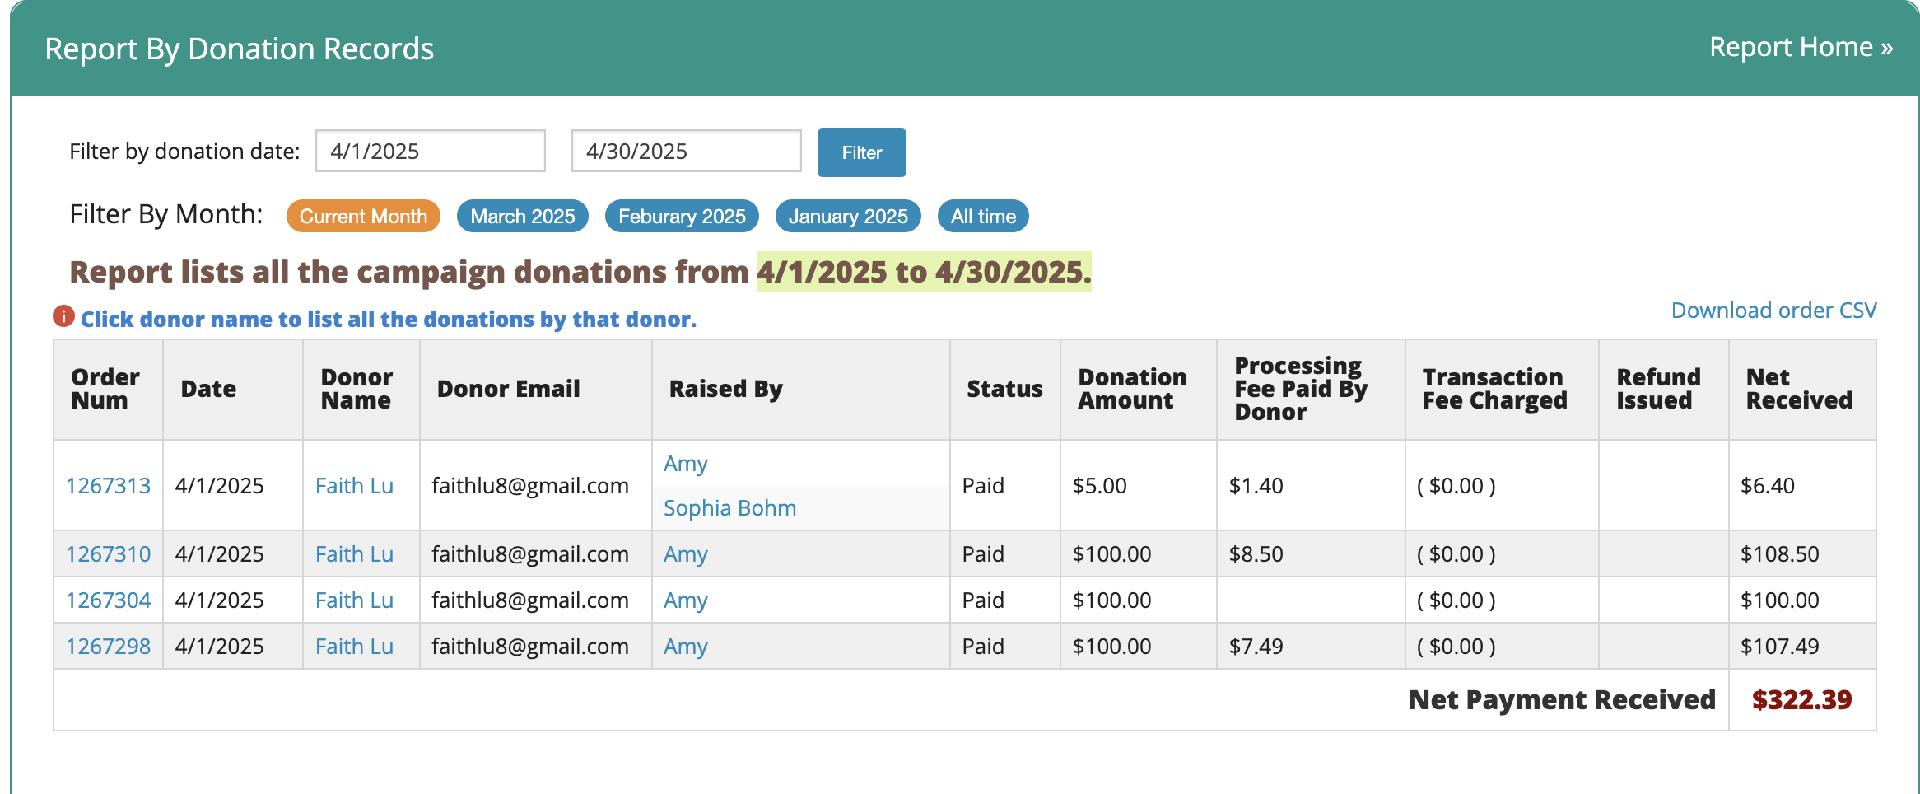
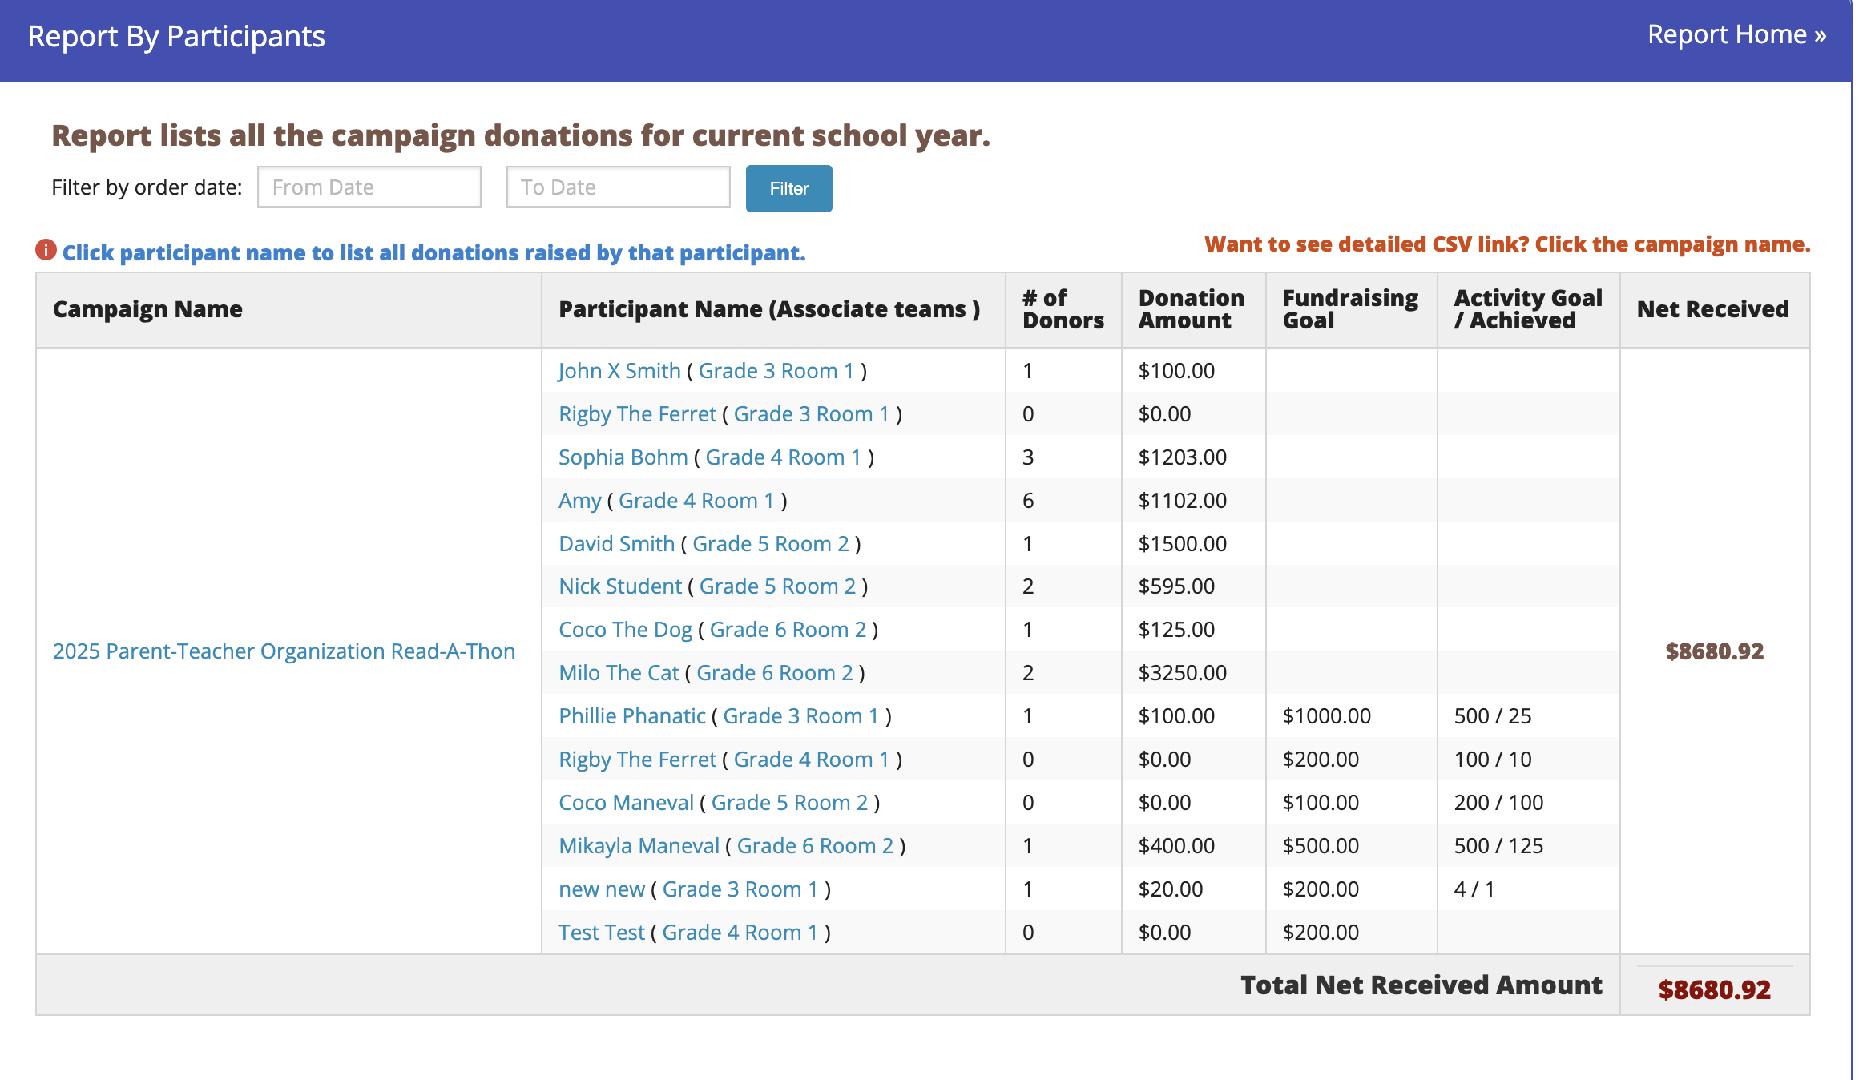
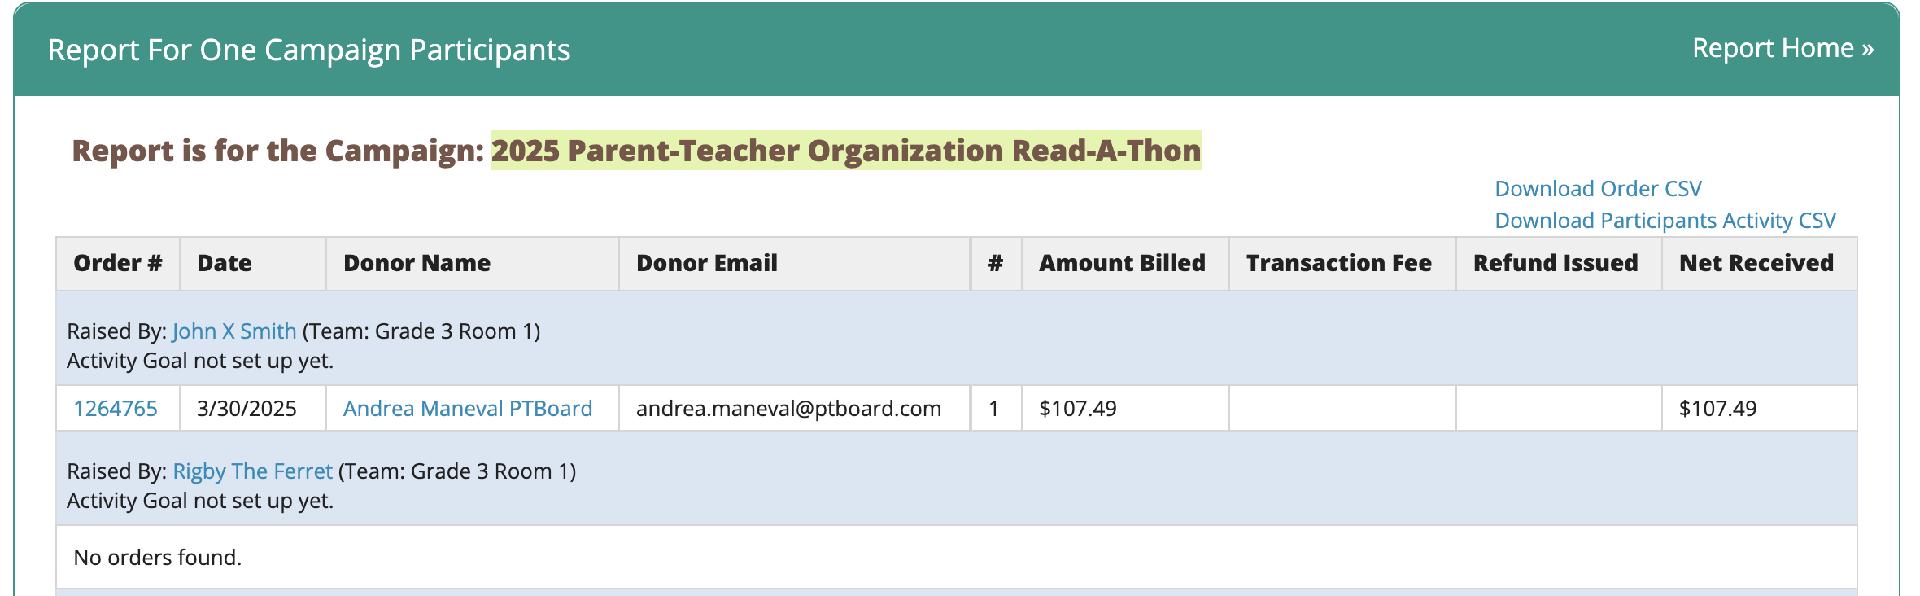
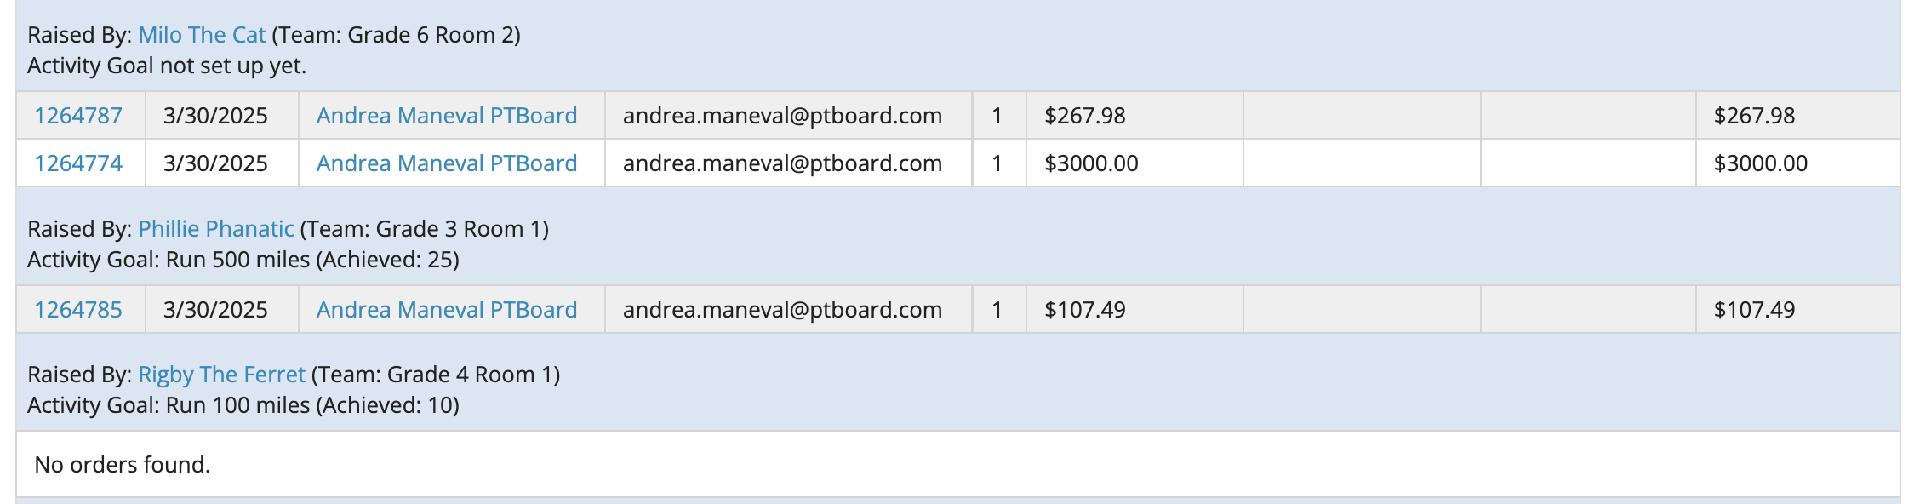
Campaign Reports are available by going to "Manage this Campaign" to view.
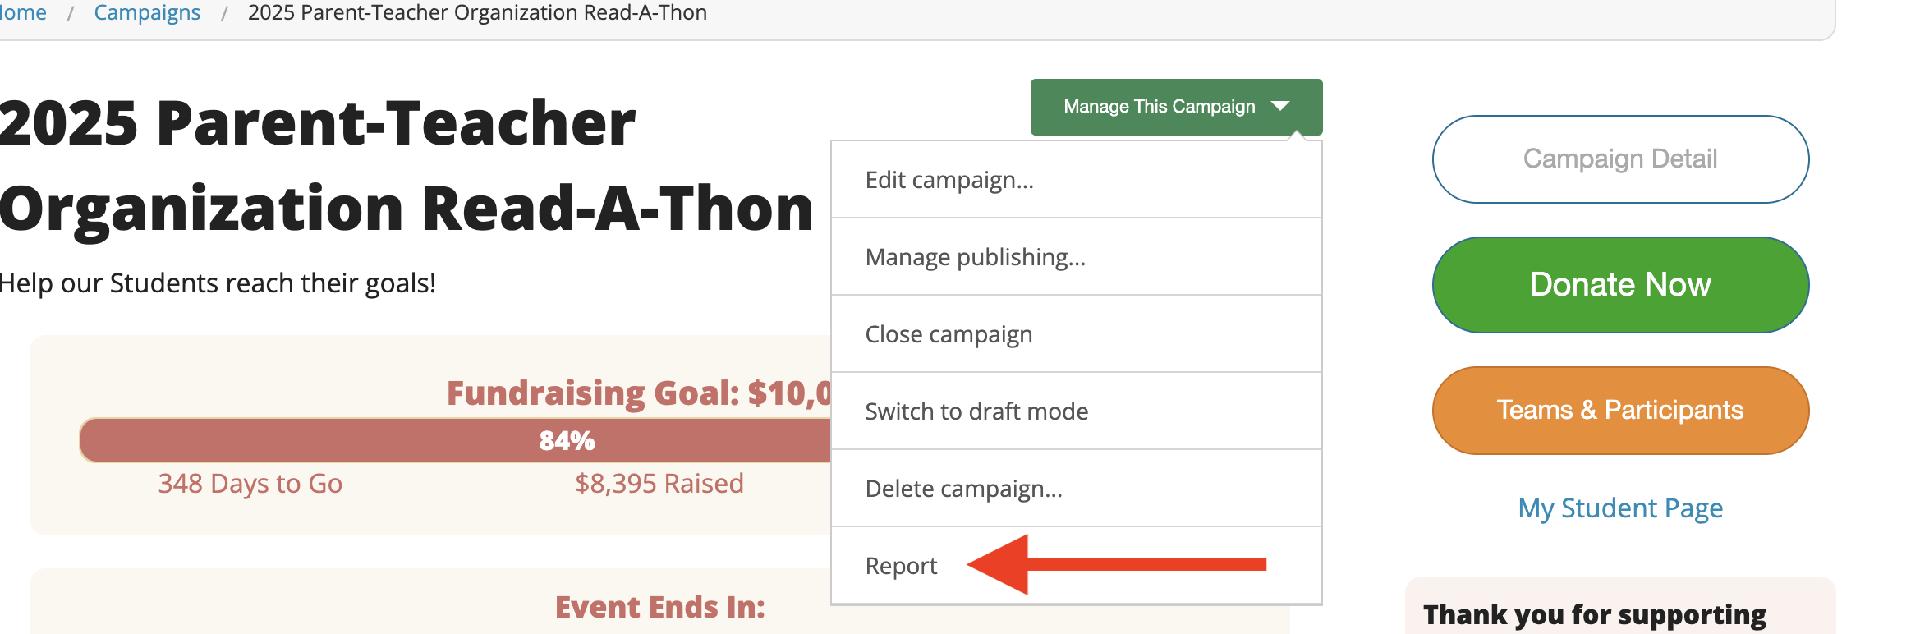
Once you click Report, you will be able to choose how you view it.